28.1.2021
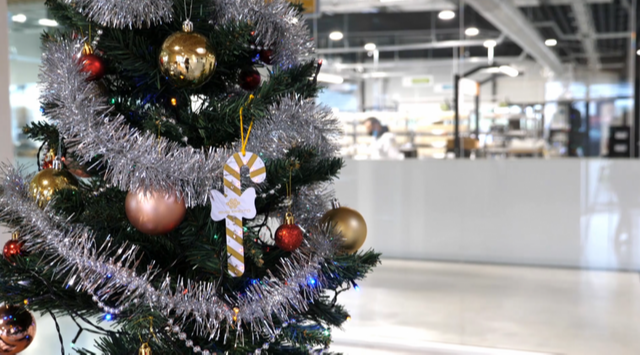
All our clients who submitted orders during December would have been surprised to find in their parcel our annual Christmas goodies !
This year we thought of Christmas Candy Canes to light up your Christmas trees 😊
Let’s lift the veil on the assembly of these delicious goodies !
Each candy cane consists of 46 SMD components and 4 through-hole battery holders.
Our technicians optimised the process of panelising of the boards to get panels of 6 boards. This allowed us to considerably reduce assembly time. Panelising the boards also allowed us to process the boards on the assembly line. Because the goodies did not have a standard size, the addition of a technical edge zone during the panelising process makes it possible to clamp the boards in the conveyors.

The first machine to get the ball rolling is the MY700 jet printer jet printer manufactured by Mycronic. This machine allows us to deposit solder paste on the printed circuit boards, and without contact. It’s a cross between an inkjet printer and a 3D printer. The precision which we have today allows us to process components with very small spacing (fine pitch) down to a pitch of 0.3 mm.

Once the solder paste is deposited on the boards, they are conveyed to the pick & place machine. This is a MY300 from the same manufacturer. This machine takes care of the placement of all the SMD components on the circuit boards. It is able to place 40 000 components per hour. The components are picked up by the machine using a nozzle which traps the components with suction, then they are placed on the receiving pads covered in solder paste.

Once the SMD components are placed, the cards go to the reflow oven. It has 9 heating zones and 2 cooling zones. This allows the use of a preheating phase and a reflow phase to the board.

The process of assembling the SMD components on the board is now finished. Now we need to assemble the through-hole components on the board using selective wave soldering.
The selective wave soldering machine is an ECOSELECT 4 from the manufacturer ERSA. Its purpose is to solder the through-hole components from the bottom of the board. This is done in 3 steps:
- Step 1, fluxing: flux is deposited on the pads and pins of the components.
- Step 2, preheating: the board is heated to a temperature of around 120°C.
- Step 3, soldering: the components are soldered by a nozzle from which molten solder flows. It moves below each pin to solder it onto the PCB.
The advantages of this technique are :
Quicker soldering
Better control and repeatability of the process.


The goodies are now ready to be put into our customers’ orders and light up their end of year festivities.

Neueste Artikel


Benötigen Sie Hilfe?

FAQ

Ressourcen
